YOUR HARDWIRED NETWORK
Today wireless seems to be the way to go for many people, but for me an Ethernet hardwired network is the ultimate in networking. It's secure and it's super-fast. And it's not difficult to set up in your home. Spend some time and run some wire!
ETHERNET NETWORKING BASICS
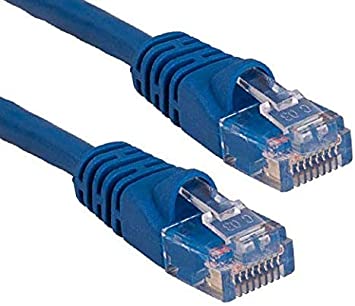 The cables used to connect computing devices are known as Ethernet cables. Their ends look like this:
You can buy Ethernet cables in multiple different lengths: 3 feet, 6 foot, 10 foot, 12 foot and so on.
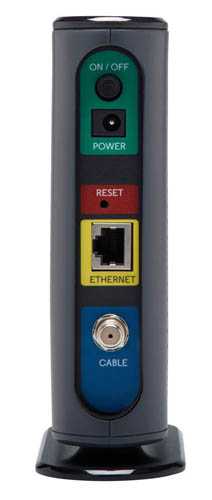
The internet signal signal comes into your home through either a Comcast cable modem or an AT&T box. An AT&T box looks like this (right): 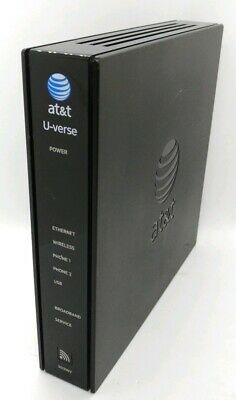
I use Comcast and I bought my own cable modem, a Motorola cable modem. The back of it looks like this (left). The incoming signal comes in from Comcast through the round cable marked "Cable" (it's a coaxial cable). If you plugged an Ethernet cable into the socket marked "Ethernet" you could then plug it into your computer and - Voila - you'd be on the internet! But this is not good because it's the only thing that would be on the internet...no phones, no printers, no other computers. You usually don't want to connect your computer directly to your ISP box like this (unless testing their signal). Instead, you'll want to plug your ISP box into what we discussed in the last section - your router. Your router will then provide all the network functionality and security that your network needs.
Chances are your router/AP is also equipped with multiple Ethernet ports, so you could connect your ISP box to your router, then all of your other devices to that router. If your router is physically near the ISP box and the number of your devices is equal to or less than the number of Ethernet ports on the router, then you'll be fine. Most of them only have 4 ports though, which is probably too few to work for your home network. And if you decide to relocate your router/access point for better WIFI placement so it's physically away from the rest of your network equipment, then this becomes impractical. It's really OK most of the time to have separate components comprise your network. Then the failure of one component doesn't require you to replace them all in one expensive box.
If you don't use your router's Ethernet ports, you'll need something called a switch. In networking terms, a switch is a device that receives data and forwards it onto its destination. It forwards data only to the device that its addressed to.
A switch looks like this:
This is a 5-port switch. You plug your router into the switch, then you could plug up to four devices into the switch and all of their internet traffic would be routed to and from the internet. You'll want to install the switch right after your router. Get a switch that has the right number of ports, minimally 8 ports but you might consider future-proofing your network with a 12 or 16-port switch. The switches you'll be buying will be unmanaged switches. These are used for the low-end consumer market and perfectly fine for the home/home office. The high end business market uses managed switches, which allow you to log into and configure them. Using a managed switch you can create things like VLANS, but if you know what VLANS are you're probably too advanced to be reading this! Don't feel like you're left out without them: managed switches are much more expensive!
You also want a Gigabit Ethernet switch. That means that its ports can handle speeds up to one Gbps. You might occasionally still see something called Fast Ethernet switch for sale cheap. Don't buy it...it can only handle speeds up to 100 mbps (the picture shows a fast Ethernet switch).
Connect your cable modem or AT&T box to the switch then everywhere you have a computing device (computer, printer, router / access point) connect via Ethernet. Use common sense here. If it's close to your ISP box, then connect it with an Ethernet cable. Even if it's farther away, like in a different room, consider running Ethernet cable to it. Here's a diagram of the way everything should be connected:
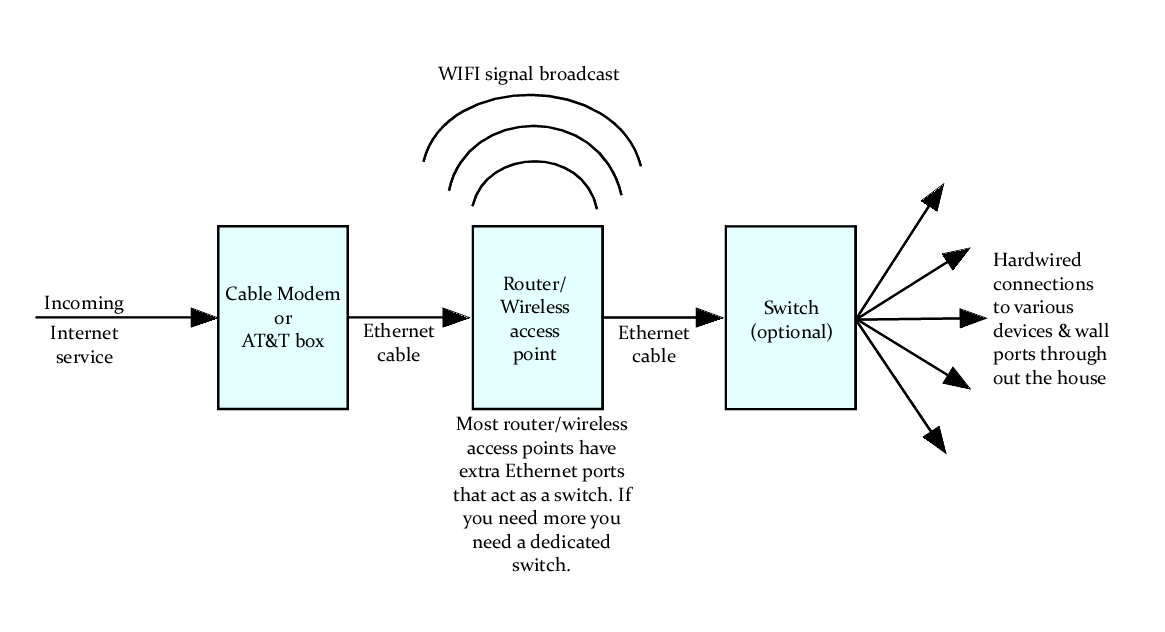
Though the details are beyond the scope of this article, here's an overview of hard-wiring your home.
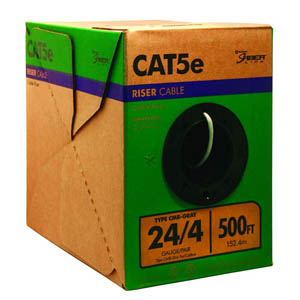
You can buy bulk Ethernet cable; Home Depot sells a 500 foot reel of it for $35. Of course there are a lot of different type of Ethernet cable. Digitaltrends has this chart to illustrate. As you can see, newer types are faster and carry more data. The article says "Cat 5e is currently the most commonly used cable, mainly due to its low production cost and support for speeds faster than Cat 5 cables." And it's cheap; the $35 Home depot box is Cat5e. Should you use CAT5e? Probably not unless low cost is your main consideration. That same box of Ethernet cable at Home Depot is $75 if it's CAT6! Buy the best type of Ethernet cable that you can afford. The better the cable, the more future-proof your installation will be.
When you're wiring your house you run cables through the walls. At each point in the wall where the cable would come out you cut a hole in the drywall (with a drywall saw) that would fit one of these:
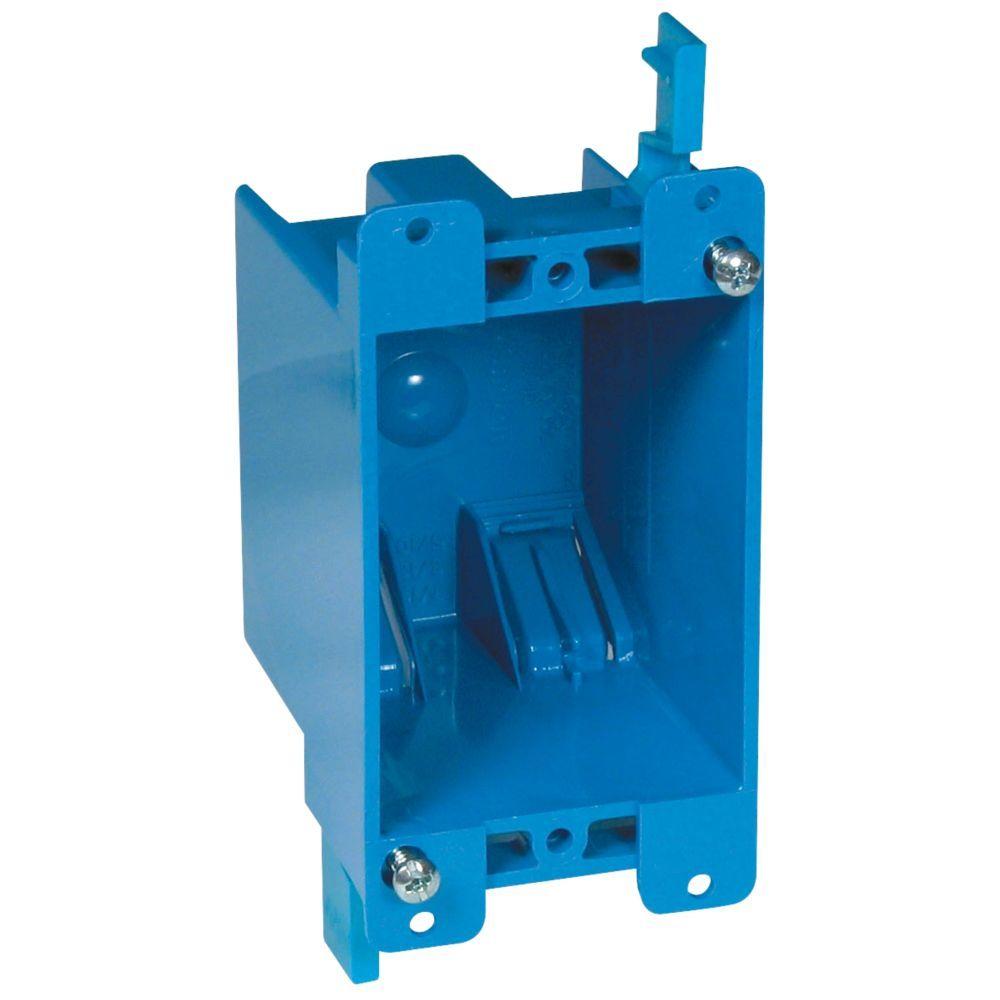
This is an electrical box (left) that allows you to insert and mount it in a finished wall.
With the hole cut, you need to fish the Ethernet cable up the wall between the studs in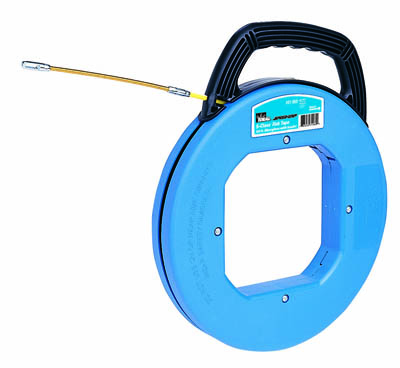 to the ceiling space. You might be able to remove panels from a suspended ceiling so you can see what's happening up there. You fish cable through walls with either a "fish tape" as pictured on the right or fiberglass rods that extend. Both are inexpensive...cheap fish tapes start around $!2 and fiberglass pull rod kits can be had for under $10. The fish tape is a springy steel coil that you run through walls or ceilings, then attach the Ethernet cable to the end and pull it back. You use ceiling spaces to get the cable throughout the house. In my house, my incoming cable service and cable modem & switch are in the basement, so most of my Ethernet runs are suspended from my basement ceiling, and I only need drill a hole at the right place to get the wire upstairs where I want it.
Once you get a run of cable thought the walls and ceiling to where you want it to go you cut it off leaving some slack (maybe 18 inches) on either end. You use modular Ethernet wall plates to finish the connection. You get little modular connector to terminate the cable. Strip away (carefully) the outer cable sheathing, exposing the wires inside. Ethernet cable has 8 wires inside, and they are grouped into 4 pairs of wires that are color-coded. These pairs represent transmit and receive wires.
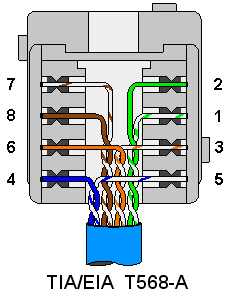
Terminate the wires onto the modular connector using a standard convention like you see on the left.
 Push the wires into the modular connector either using a simple tool included with the connectors or something called a "punch-down" tool, again not hugely expensive.
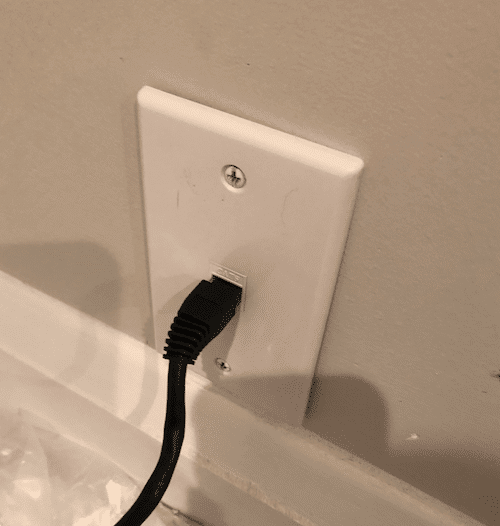
Then you simply snap the connector onto the same companies wall-plates and using two screws (included) screw the wall plated onto the wall boxes, coiling the slack cable inside the box. Now you have a professionally-done wall jack for an Ethernet connection!
Once you have wall plates installed and wires run wherever you plan on having a device (television, wireless access point, computer, printer etc.) you'll have a bunch of wires back at your network area where your switch is.. At this switch end you don't necessarily have to terminate cables into a patch panel (how businesses do it) but rather you can just crimp an Ethernet jack onto the cable end and plug directly into your switch. You really should use a patch panel though for the flexibility it gives you.
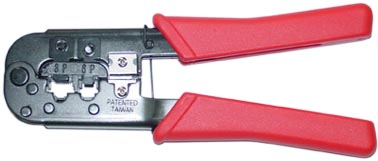 Ethernet cable is terminated with a crimper tool. Again not hugely expensive.
Once again you strip off the insulating cable jacket and expose the eight individual wires. You align them in a  particular order per Ethernet convention, and push them as far as you can into the clear Ethernet connector (right). Then you carefully insert the connector and wires into the crimper and clamp down - hard! Instant Ethernet cable end!
If all this seems like a lot of work and a fair amount of expense, it is. The various tools are all pretty inexpensive but together they add up. You'll spend a lot of time and require a helper to wire up your house with Ethernet. But I can tell you this: it's not hard at all, just tedious. And if you invest the time you'll wind up with a rock-solid hardwired network that will do whatever you need it to do without the vagaries of a wireless network for years to come AND it will deliver better (and hack-proof) performance. It actually complements wireless service as it'll let you locate an access point or wireless repeater somewhere where you can hardwire it in, then it'll greatly enhance your wireless service.
Give careful thought to installing a hardwired Ethernet network, it's an investment that will pay you back for as long as you live in that house with stable fast rock-solid service throughout the home.
